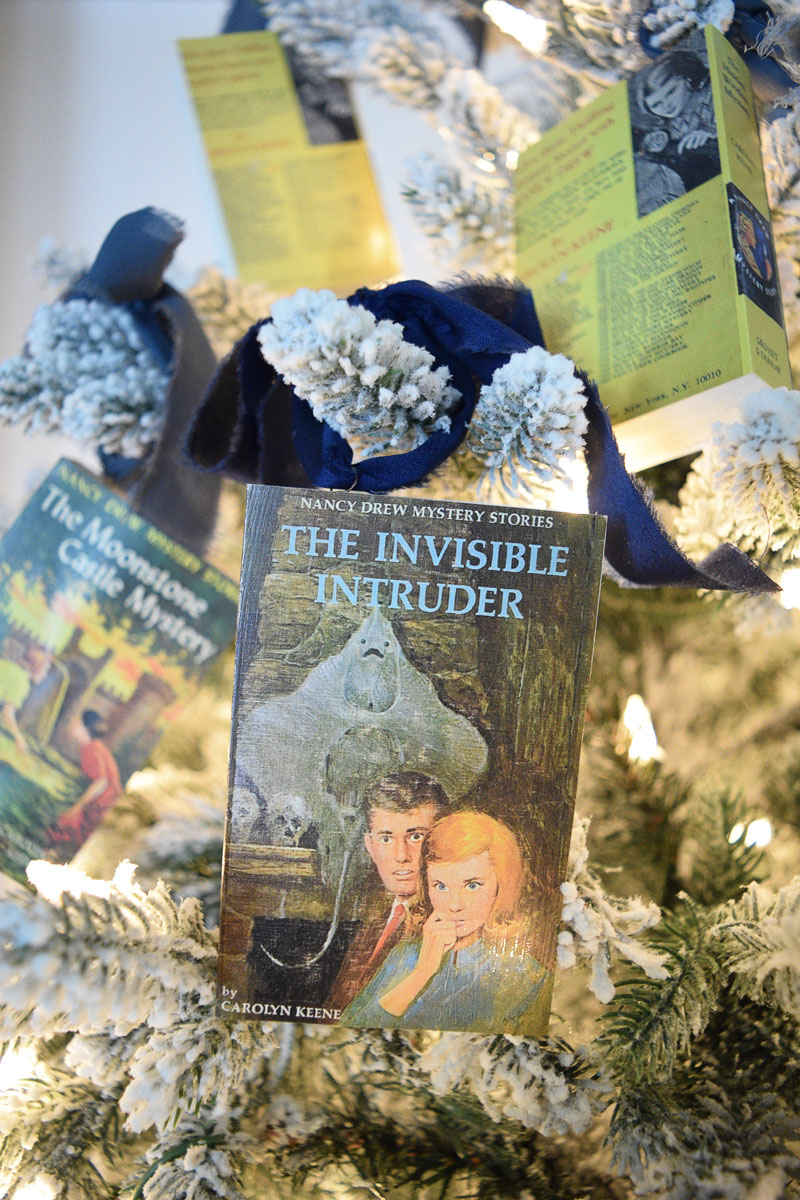
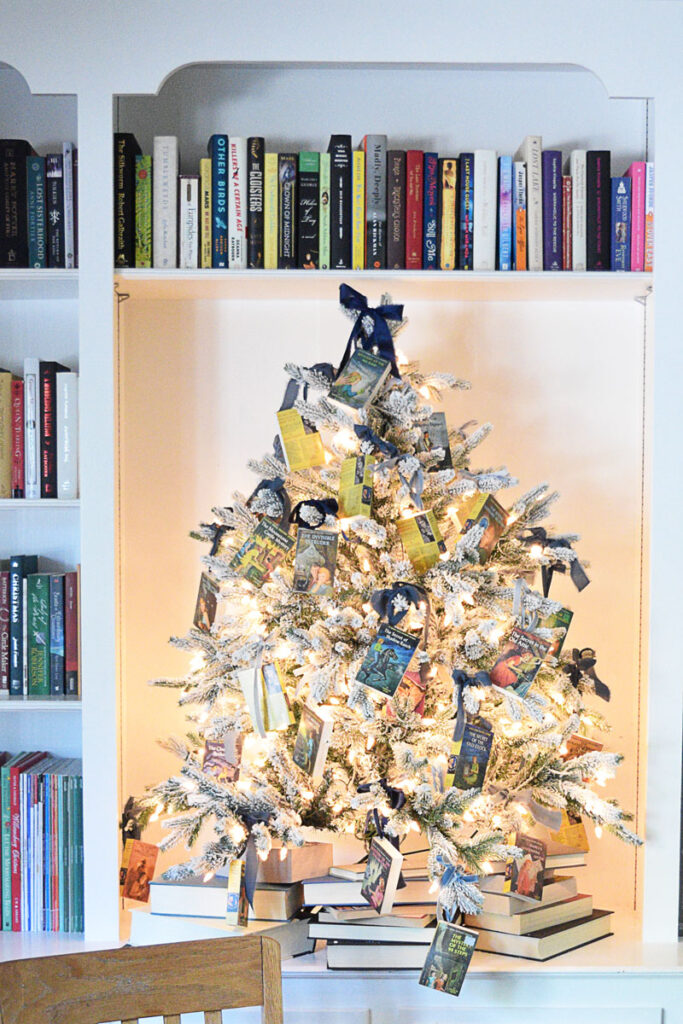
Nancy Drew books were the bulk of my reading materials for a long time. She taught me morse code for S.O.S. (dot dot dot dash dash dash dot dot dot), that you can find out what someone wrote on a pad of paper by shading the back of the page below, and she inspired my lifelong urge to learn how to pick locks. This Nancy Drew book themed Christmas tree is years in the making.
I think Nancy Drew was a gateway book to reading, womanhood, and trouble-making curiosity for a lot of us. My mom had been an avid Nancy Drew reader growing up, and had a nearly complete set of the yellow book collection that she kept.
When I started getting more into reading as a kid, she offered the books to me. I was instantly hooked. And, now looking back, one of the most impressive things was that she could still recall the plot to most of those books. In-freaking-credible.
I devoured that 55 yellow-backed book collection about a girl sleuth from River Heights. Luckily for me, Carolyn Keene (long may that pseudonym reign) had been keeping busy. I went from the classic Nancy Drew books to the Nancy Drew Case Files. Once I’d found every possible one I could at new and used bookstores, I was blessed with the discovery of the Nancy Drew & Hardy Boys Super Mysteries. These were a real delight because there was an oft alluded to but never acted upon love triangle between Nancy and Ned and Nancy and Frank. Then, a real treat came in the form of Nancy Drew on Campus, where Nancy aged enough to attend college. The mysteries were in the name of investigative journalism and the romances as a reason to get over Ned Nickerson.
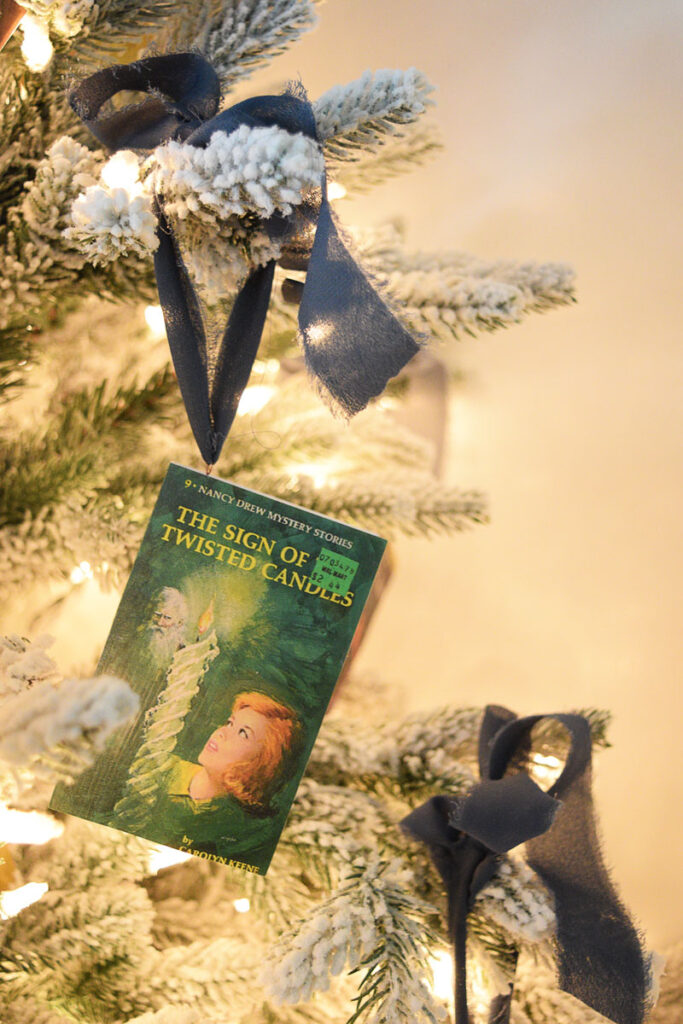
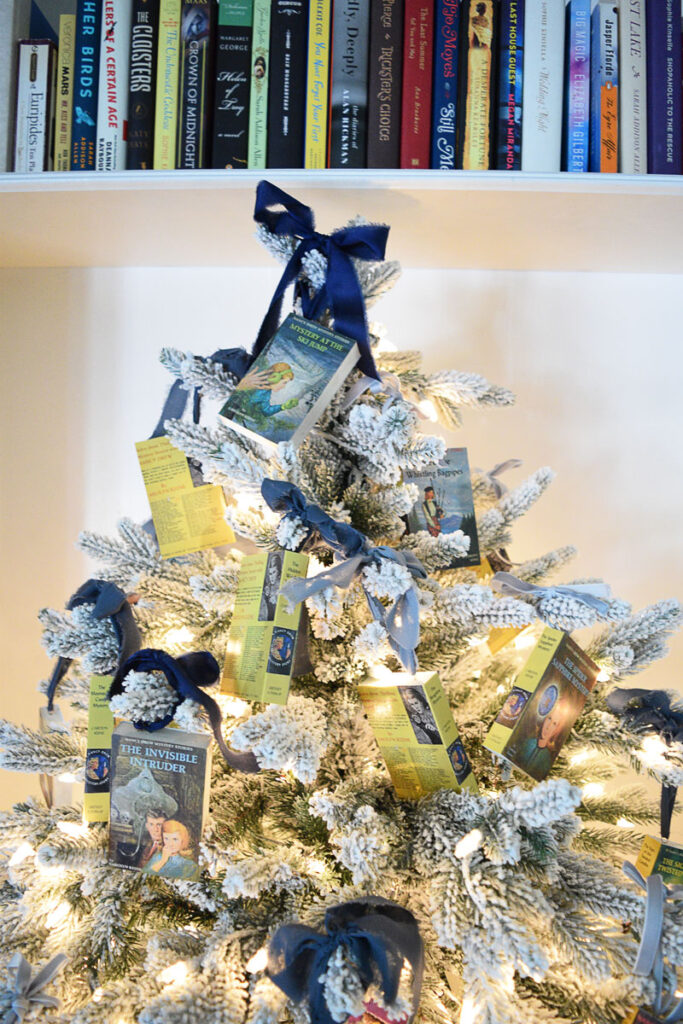
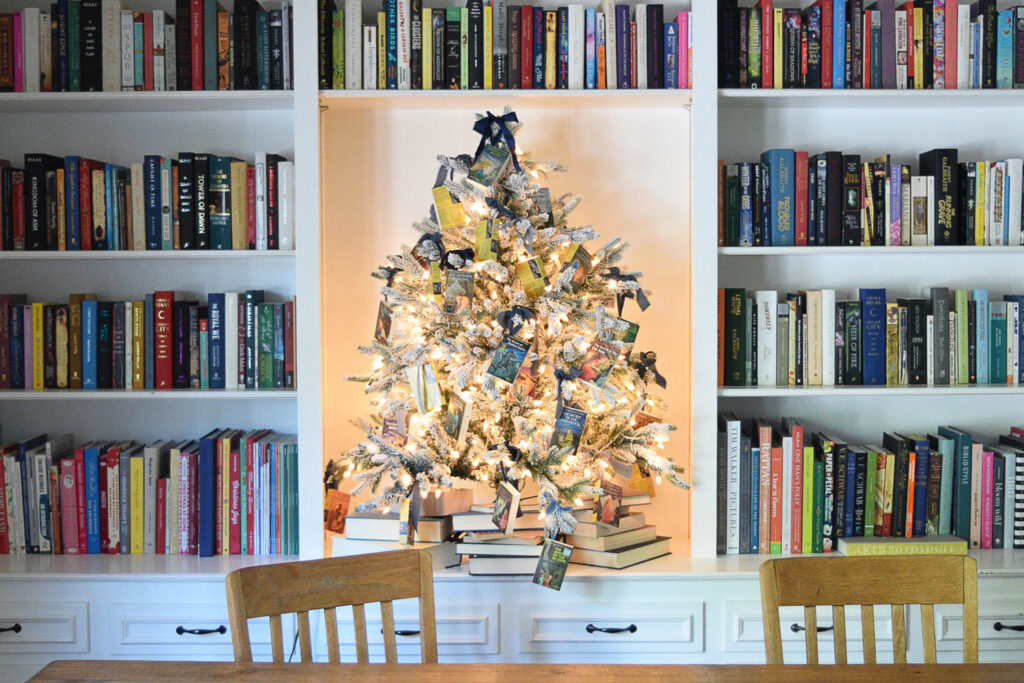
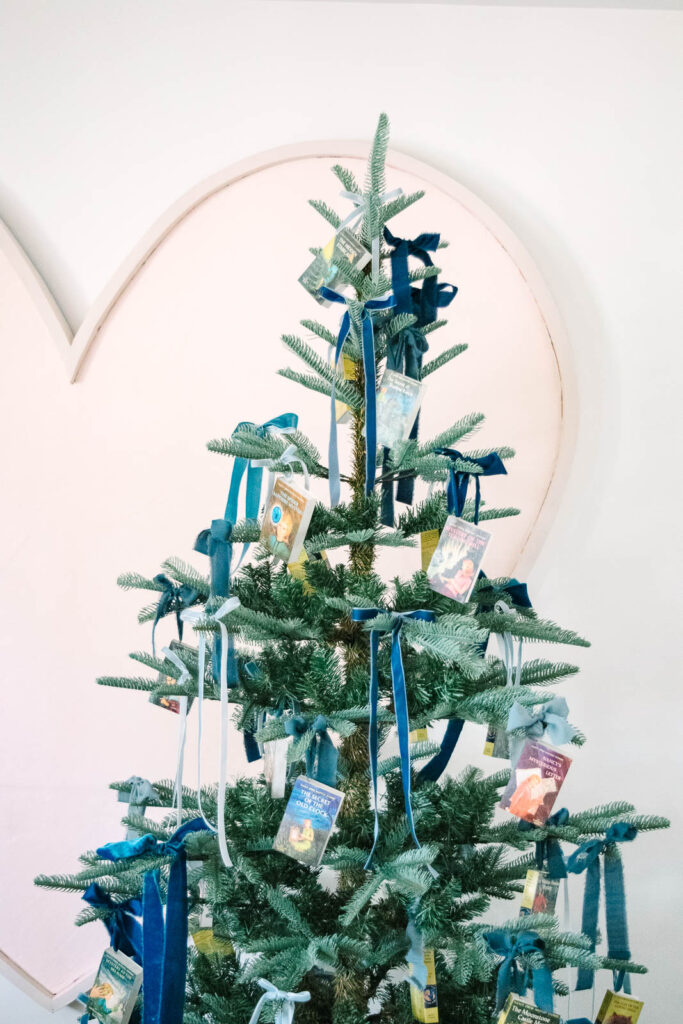
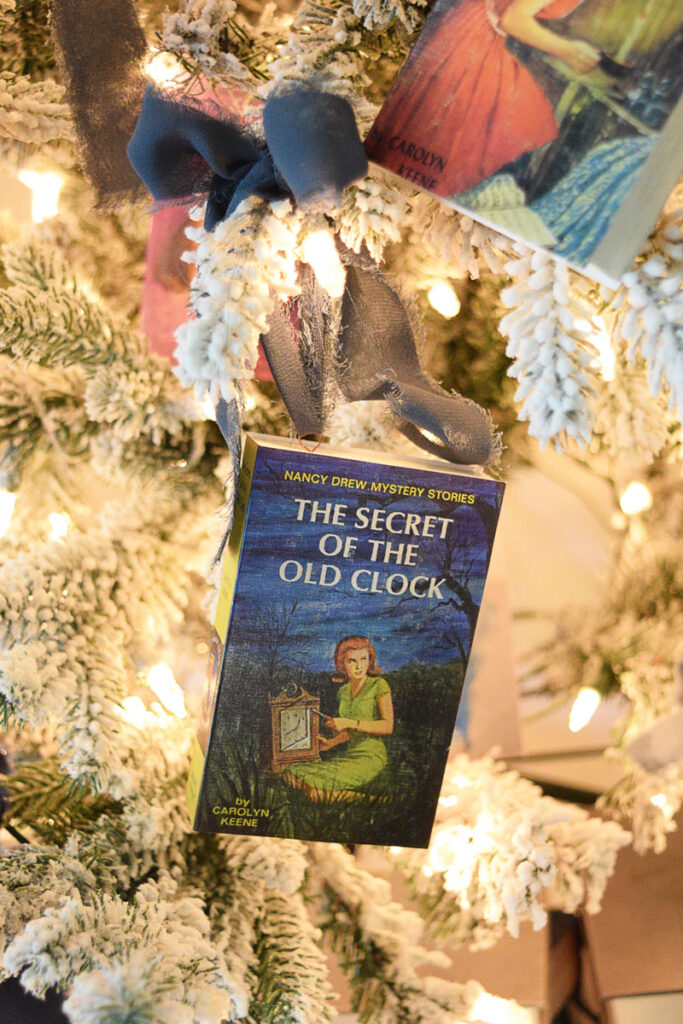
I kept Nancy Drew on my bookshelves for a long time. My Case Files, Super Mysteries, and Campus series are all in boxes in the attic. Just in case. My mom has moved her yellow-backed collection to its own shelf in the room I sleep in while visiting. When I saw them on a trip this summer, I was struck with inspiration. I wanted to create a Nancy Drew book themed Christmas tree that stirred up all my happy memories of curling up with a good book that sent me on an adventure.
If you’re a fellow Nancy fan, I’m especially excited to share this with you. And, I hope to start a spirited discussion in the comments about everyone’s favorite books and if you read the later published series and if you knew/have attended the Nancy Drew conference (which, yes, does exist). But for now, here’s my book tree and all the details of how I made it.
Nancy Drew Book Themed Christmas Tree Blueprint
Tree
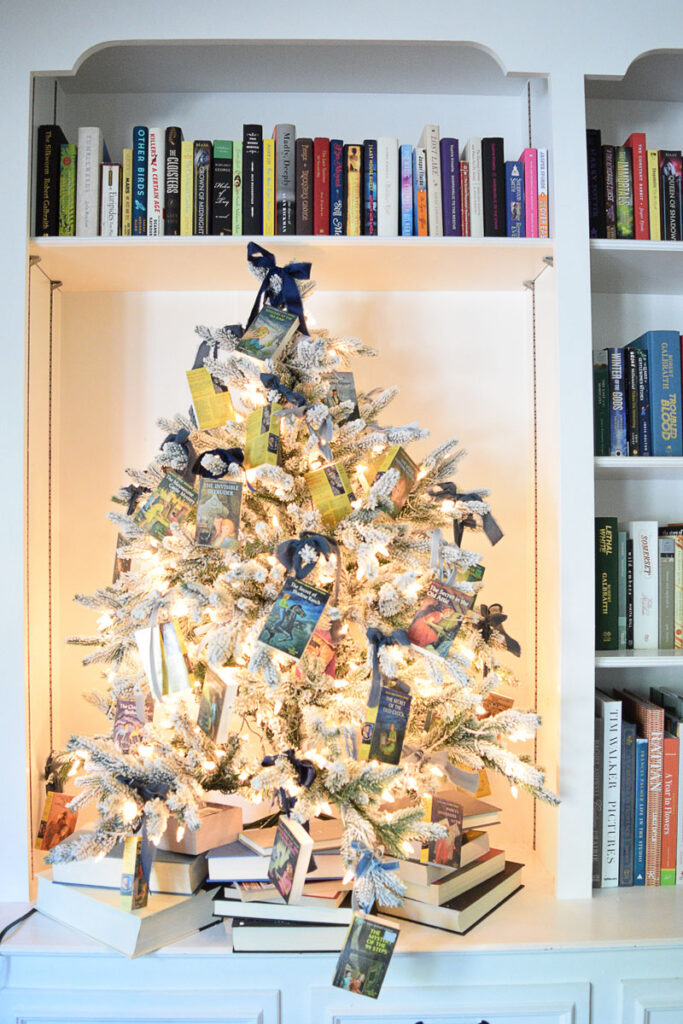
This is my newest Christmas tree acquisition: a seven foot alpine style spruce from King of Christmas. I purchased the unlit version because I wanted to have the option of a tree that truly looked natural.
Hot Take: I love buying an unlit tree. I get the ease of a pre-lit tree and will deny no one the joy of having a tree up and lit within minutes. However, I have found that an unlit tree holds up longer and gives me more options. Plus, when I want a lit tree, I want a lot of lights. Like easily over 1000. Griswold-style lights.
Anywho, I wanted a natural looking tree and one with lots of white space like this one so that my book ornaments would really stand out. If you’re in the market for a natural, sparse tree, I do recommend this one. I’ve been very pleased with it especially for the very reasonable price.
Base & Topper
I bought this black metal Christmas tree base last year at Target, I believe. Because it’s so basic, it’s versatile. I don’t feel like it distracts from the overall look either. I’m on the hunt for some in more dull metallic colors, so if you see some please share!
In a lot of tree designs, the topper is a chance to really go big. That’s not my style though. I want the triangular shape of the tree to still be visible. I also find it kind of charming and natural for there just not to be a topper. It’s a good edit for me.
Ornaments
The BEST PART! I’ll go into a deep dive in the section below. In addition to the miniature Nancy Drew book ornaments, I new I wanted something that tied the tree together. I thought about traditional baubles, but the tree would look very graphic because the only shapes would essentially be circles and rectangles. Cool if I wanted to play up a mid-century vibe, but not what I was hoping for.
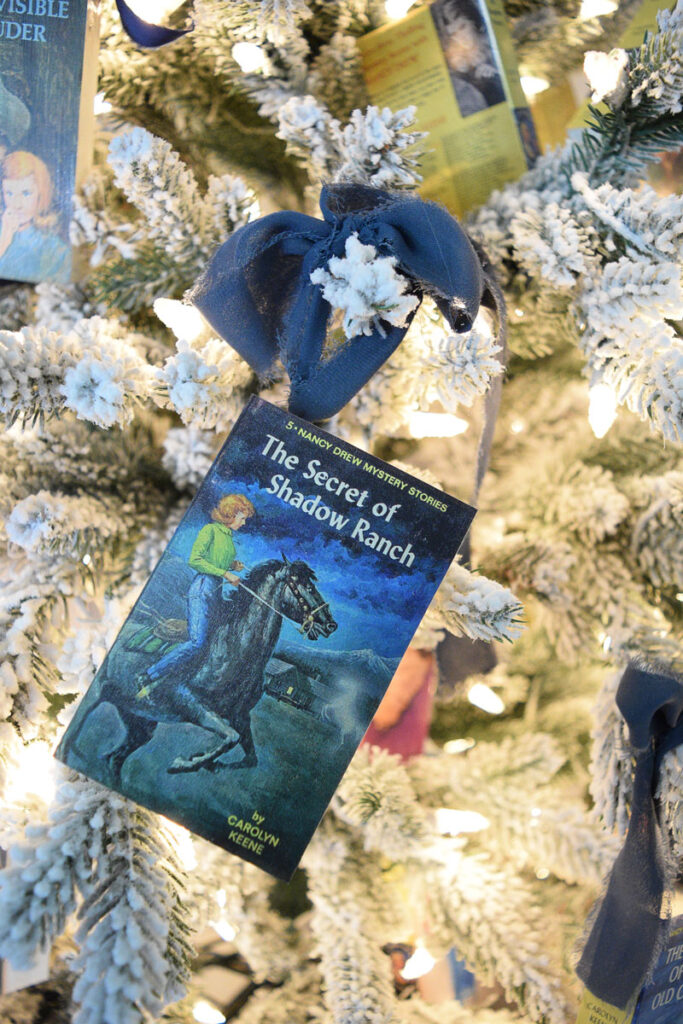
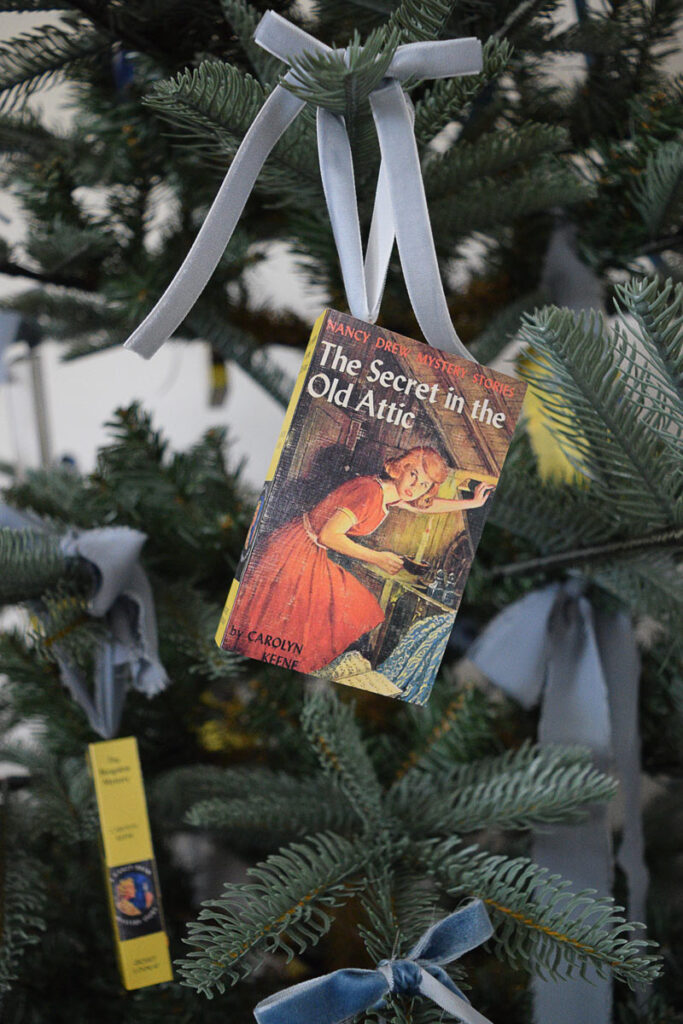
So, I went to what is now becoming my new ornament-neutral: ribbon bows. Since the original Nancy Drew books were blue, a variety of blue-shaded bows were the perfect choice. It gives some texture and shape to the tree and really lets the books shine.
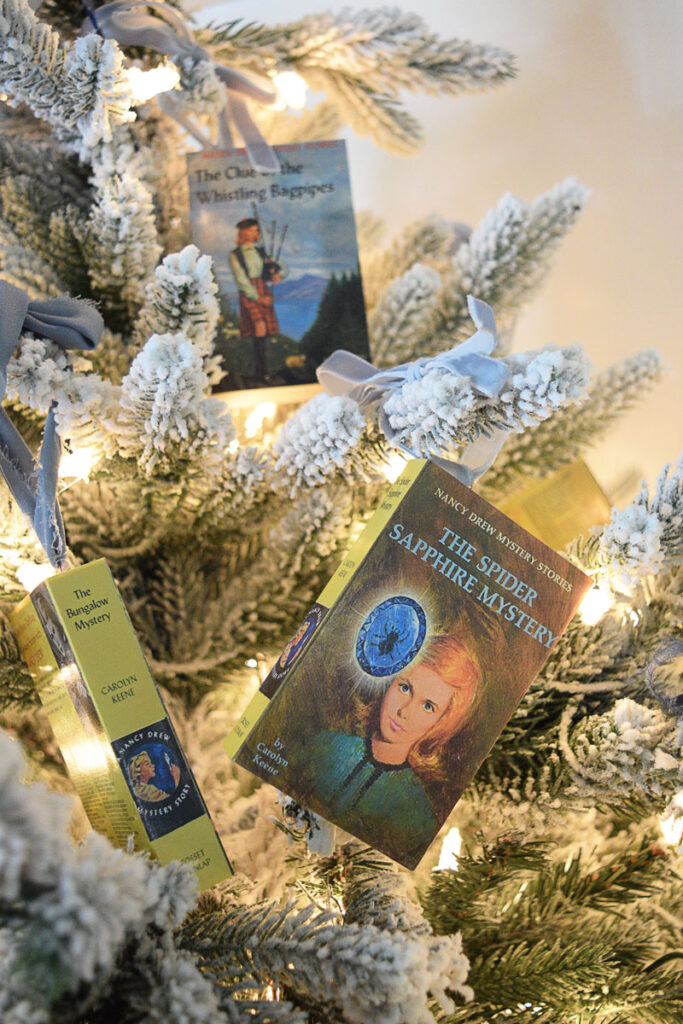
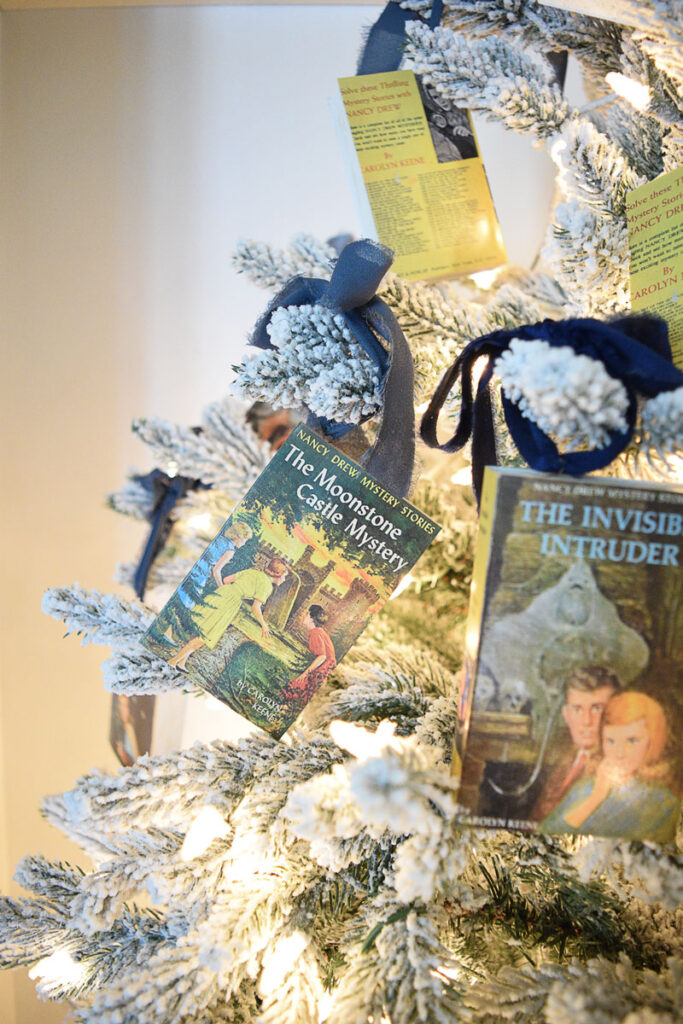
How To Make Nancy Drew Book Ornaments (Or Any Book Ornament)
Now, I could have chosen a fuller tree and placed the actual books on the tree. This is a great option if you genuinely just want to keep it simple. But, I’ve never been someone to go the easy route.
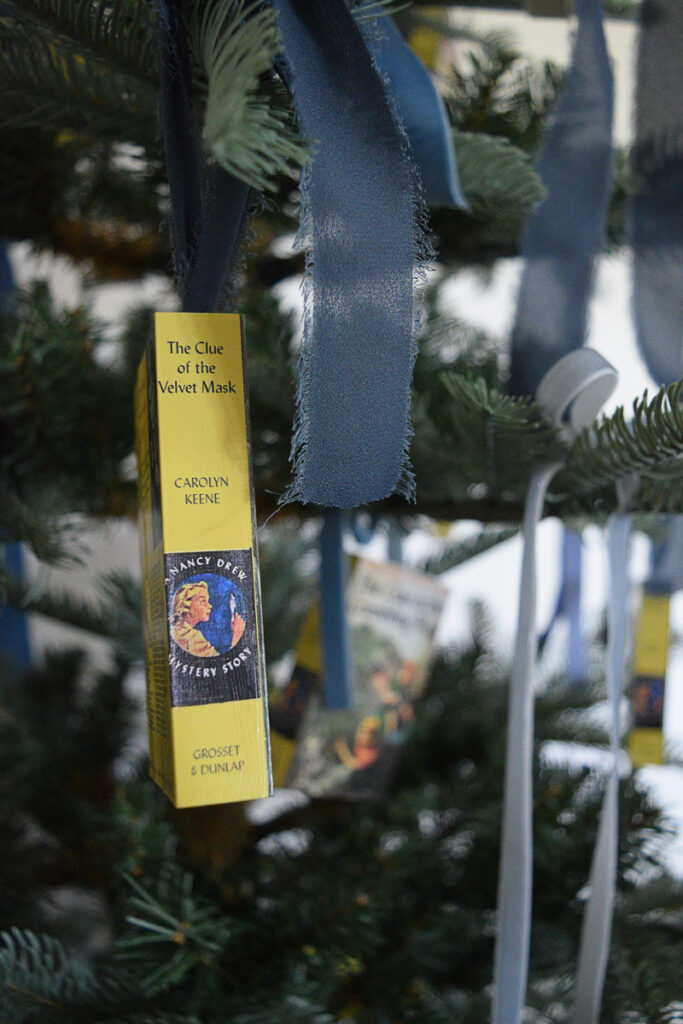
I wanted my book ornaments to look more like ornaments. These are 3.5 inches by 4 inches. These are simple to make, and you could create them for any book or series you love.
Supplies
- 4×6 Prints of Your Book Cover (I’ll share my template with you below)
- 1”x4”x8’ Piece of Wood
- Aleene’s Tacky Glue
- Loctite Super Glue
- 24 Gauge Wire
- Wire Cutters
- Ribbon
- Matte Modge Podge
- White Paint
- Paintbrush
1. GET YOUR BOOK COVERS MADE.
To keep this simple, I wanted to be able to print my covers out on a traditional 4×6 inch photo paper. If you have the option, try to print them on matte photo paper. We want to eliminate the amount of shine and reflection so that it looks more like a real book.
Using your phone, take a photo of the front and back covers of your book. It doesn’t need to fill up the whole photo, you can crop it when you’re designing.
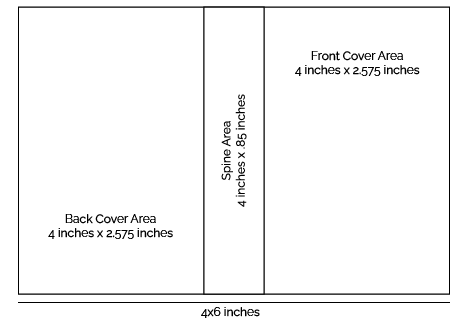
Below is a template breakdown of how I sized everything out.
I made my book covers on Adobe Illustrator, but I think you could use a free program like Canva as well. First, you’ll add the back cover to the left section and the front cover to the right. Crop as needed.
To make the spine, I made that section yellow (to look like the real thing), added a photo of the spine image from the interwebs, and then typed out the publisher, author’s name, and title as realistically as possible. Luckily, they’re going to be small so don’t get too obsessed about perfection.
Now, print them off and fold them appropriately.
2. CUT YOUR PIECES OF WOOD.
1x4s are actually .75 inches by 3.5 inches, making them a perfect fit for your book ornament. Use a chop saw to cut all of the pieces you need.
If you don’t have a saw or would simply prefer not to use one, you could cut multiple pieces of thick foam core board. You could get by cutting with an X-acto knife.
3. ADD HOLES TO YOUR WOOD PIECES.
I coerced my husband into using his drillpress to drill half inch holes onto the top of my wood blocks. If this was a real book, the hole would go in the top part of the pages with the top of the spine to the left.
I had him drill the whole about three-quarters of an inch from the top left corner because I wanted the book to hang at an angle. This is completely preferential. You do you.
If you do not have a drill press or the desire to hand drill them all in, you could make a hook and superglue it to the “back” part of the book so the loop would still stick out of the top. You’d cover the hook’s tail with the photo cover, so everything would still be hidden correctly.
4. PAINT YOUR “PAGES.”
This part is fast! Paint the three edges of your mini book ornament that will look like the pages white. If you want to get crazy, you can dry brush a slightly darker grey or tan over that to give the pages more texture. Let them dry.
5. MAKE AND GLUE HANGERS.
I could probably turn anything into an ornament. Seriously. I’m getting really good at it. I can make these hooks without looking anymore.
To make a hook, cut a 1.5 inch piece of wire. Using something round, like a pencil or chopstick, wrap the wire around it, so you’ve got equal leftover on both sides. Then twist away until you have a perfect loop followed by a twisted tail. Cut the tail so that it’s approximately half an inch long.
Adding a dot of superglue to the tail, stick it down into your pre-drilled hole. Let it dry. Easy-peasy.
6. GLUE ON YOUR PHOTO BOOK COVER.
Make sure you’ve pre-folded these before you start gluing! It’s going to make the final product look much better and make this go much faster.
Swipe on a line of glue (I am a die hard fan of Aleene’s Tacky Glue) along the spine and the outside edges of the front and back covers. You don’t need to go crazy, but make sure it’s enough to really hold.
Then, starting with the spine, glue down your photo cover. Follow the instructions for your glue, but I found holding it tightly for about ten seconds was enough for the wood and photo cover to bond. Let it dry.
7. MODGE PODGE THE BOOK COVER.
Using your paint brush- or better yet, a sponge brush you can destroy- cover your book cover in a thin layer of Modge Podge. The goal here is to eliminate even more glare so that these really look more like books. Let dry.
8. ADD A RIBBON AND SHOW YOUR FRIENDS.
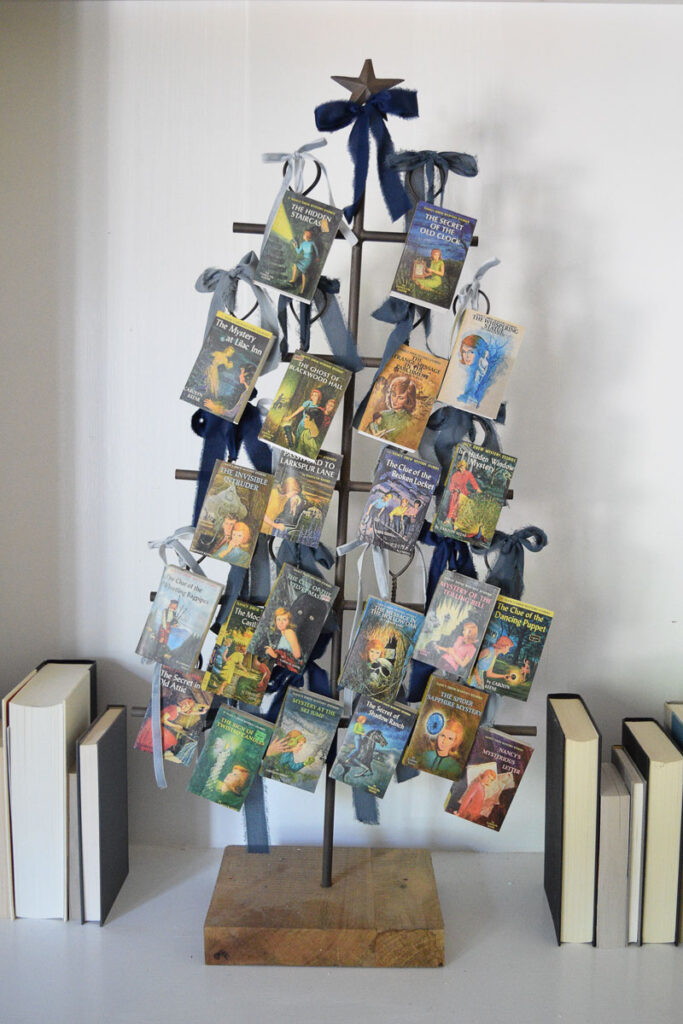
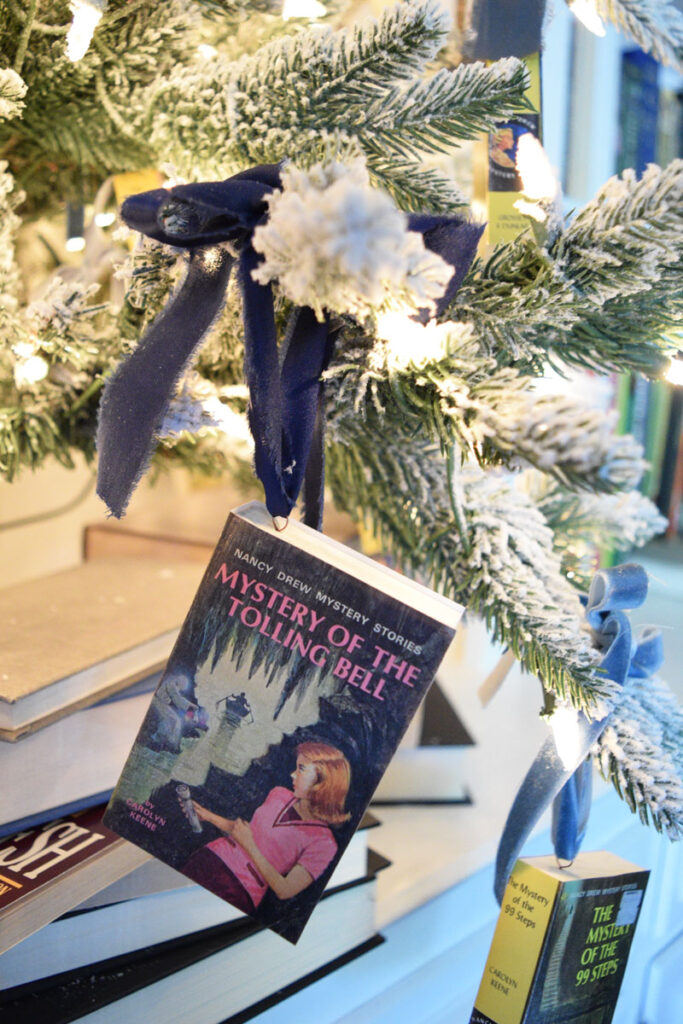
I feel like I say this a lot, but it’s always true: I love this tree. I not only love how it looks, but it gives me such nostalgic feelings about my mom and Nancy. I’m a big reader, so now I also kind of want to do a tree of all of my favorite books. It would be a very different look though.
Part of why I believe this tree really works aesthetically is the cover art of these yellow-spined Nancy Drew books. The art is so colorful and captivating. I definitely have some books that are my favorites simply because I love their covers.
So now is that time: let’s talk books!
In honor of my Nancy Drew book themed Christmas tree: Which Nancy Drew was your favorite? Did you read the later series? Have you ever thought about buying an old clock to put on a shelf and then altering it so you can hide things in it?
Leave a Reply Cancel reply
Make merrie with this little freebie
Download this bow SVG cut file - on me! Perfect for ornaments, garlands, or gift tags.
| Website Design by EP Design
© Merrie Company 2024
